Changes in IPPB POSA Linkage Process Flow :
Display of POSA Account names and modification in consents As mentioned above, to aid and assist End users in the POSA Linkage process, the POSA Account name would be fetched from DOP and displayed along with the IPPB Account name. It shall be noted that the existing process of perusal of POSA passbook and matching details with IPPB account will continue hitherto. Display of both account names is an additional facility for enhancing the POSA Linkage process and NOT a replacement of the existing process. End-users shall be conveyed, of this, very specifically.
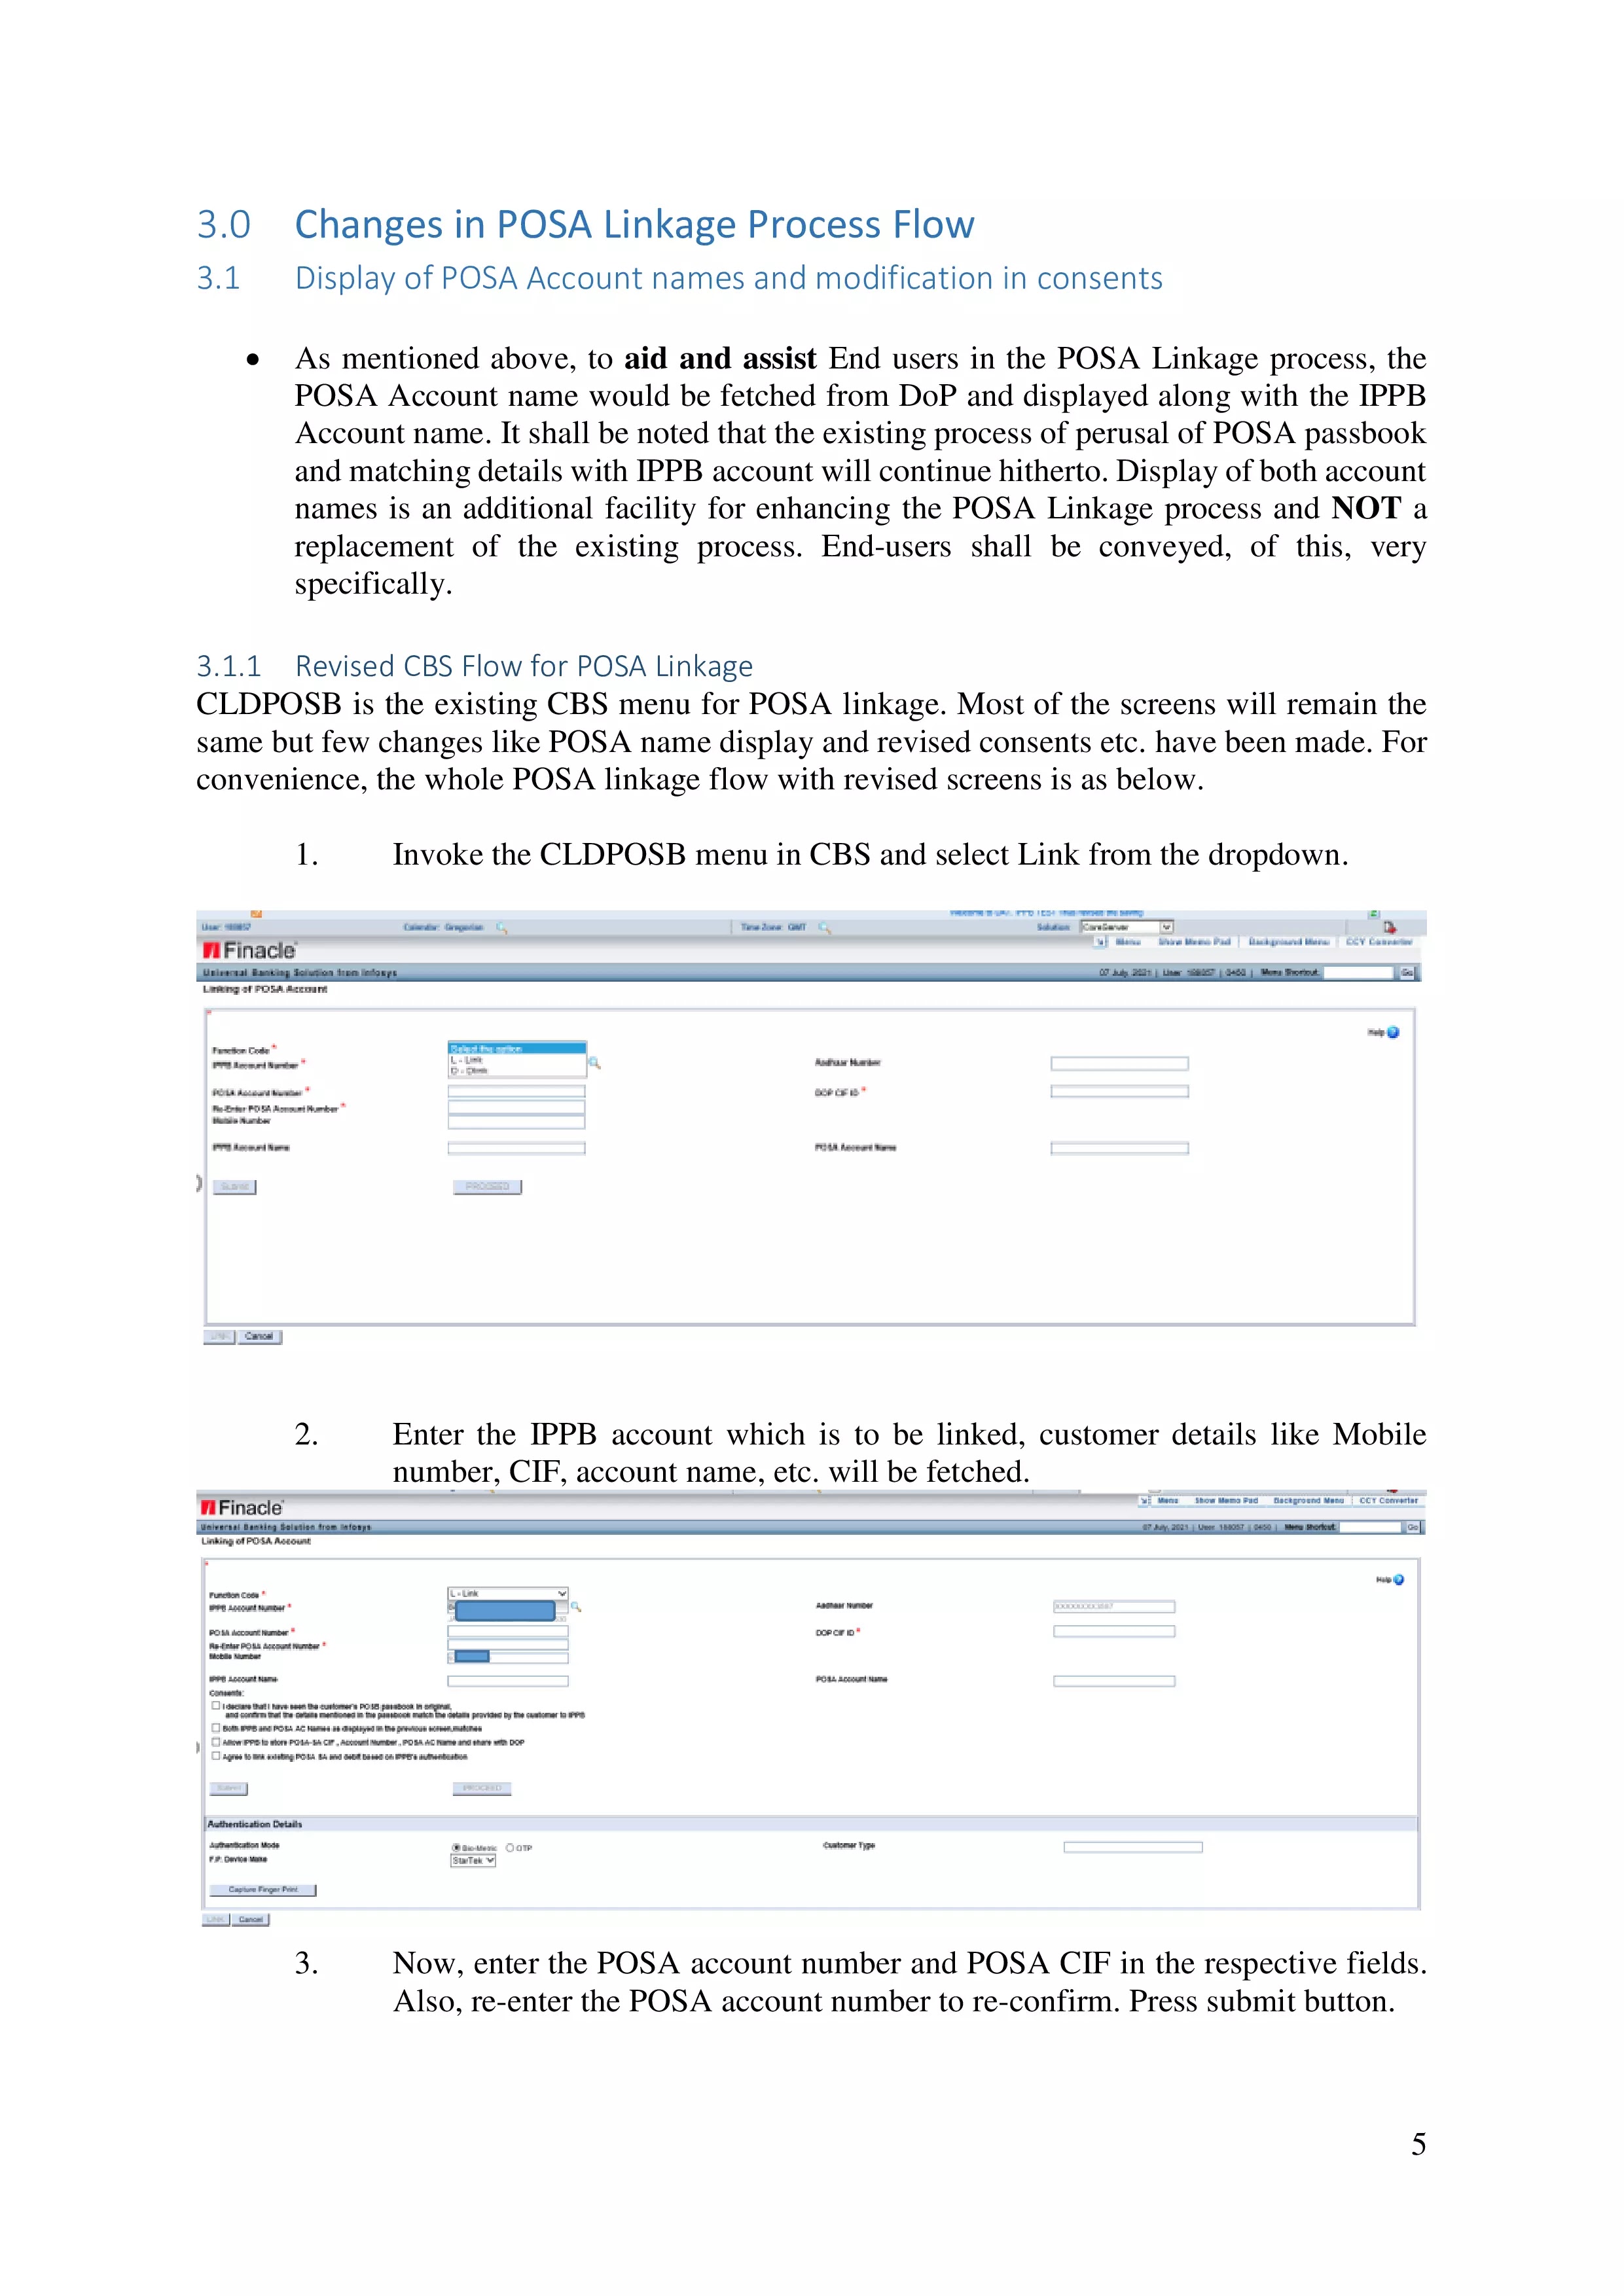
3.1.1 Revised CBS Flow for POSA Linkage CLDPOSB is the existing CBS menu for POSA linkage. Most of the screens will remain the same but few changes like POSA name display and revised consents etc. have been made. For convenience, the whole POSA linkage flow with revised screens is as below.
IPPB POSB Account Linking Process is as follows:
1. Invoke the CLDPOSB menu in CBS and select Link from the dropdown
2. Enter the IPPB account which is to be linked, customer details like Mobile number, CIF, account name, etc. will be fetched.
3. Now, enter the POSA account number and POSA CIF in the respective fields. Also, re-enter the POSA account number to re-confirm. Press submit button.
4. Once submitted, the name from POSA A/c and IPPB A/c will be fetched and displayed. End-users must check and ensure that the names match. POSA name fetched should also be checked with POSA passbook and ensured that it matches.
5. End users will have the option to click on the Cancel button, as highlighted, and abort the POSA linkage process, if the POSA Account name fetched and displayed does not match with POSA passbook details or IPPB Account name.
6. If details are matching and End-user chooses to proceed with Linkage, all required consent must be selected as per response from the customer, who shall be informed and explained about the consents.
7. The first and second consent is to be given by End-user and remaining by the customer. Consents to be agreed and as displayed on the screen will be as below
8. In the next step, agree to all consents and perform biometric authentication
9. Once the authentication is successful, click on the Link button to complete the POSA Linkage process. In case of any issues, the Cancel button can be used to go back to the Home screen which will abort the linkage process.
10. Post authentication, POSA Linkage status will be displayed. Status can be a success, failure or Under processing.
In this instance the POSA Linkage is successful. SMS alerts will be sent to IPPB customers informing the same. Sweep-Out transactions can be initiated immediately. Sweep-in transactions can be undertaken after a cooling period of 24 Hrs.
In this instance, the POSA linkage request is submitted successfully but the Linkage itself is not complete and the same may take up to 3 working days. This scenario may be due to Time out or Random cross-check at CPC. a. Timed out scenario – At times, POSA Linkage request gets timed out as appropriate response from DoP systems are not received within the agreed time. This generally happens due to network issues and occurs less frequently. Such records will be resubmitted for POSA Linkage by system automatically and the POSA linkage status may change to either successful or Failure. Customers will be kept informed by SMS of the actual status. Generally, this may take few hours to a maximum of 3 working days. Since the POSA linkage is not complete,
No Sweep-in or Sweep out transaction can be initiated until POSA Linkage completion. End users or Branch officials can check the present status of such records in the CACCTINQ menu, as illustrated later in section 8.0 of this document
3.1.2 Revised mATM flow for POSA Linkage Most of the screens remain the same as earlier, but there are few changes in some of the screens in the POSA Linkage process through mATM. Revised POSA Linkage flow is as below
1. Go to the Manage POSB Account option under the Account services module


